
As the last traces of winter frost vanish and the first blossoms of spring appear, most homeowners turn their attention to outdoor landscaping and deep-cleaning their interiors. However, there is one critical component of home comfort that often sits dormant and neglected during this transition: the air conditioning system. After months of inactivity, jumping straight into a high-demand cooling cycle without preparation is a recipe for mechanical failure. By following a comprehensive Spring AC tune-up guide, you can ensure that your system transitions smoothly from its winter hibernation to the heavy lifting required during the upcoming humid months. Taking a few proactive steps now not only guarantees a chilled indoor environment but also protects your wallet from the spike in utility costs that occurs when a system struggles to perform.
Why Spring is the Ideal Time for Maintenance
Timing is everything when it comes to HVAC health. Waiting until the first triple-digit heatwave to test your air conditioner is a high-risk strategy. During the peak of summer, HVAC technicians are often booked weeks in advance, and emergency repair rates can be significantly higher. Spring provides a “buffer zone” where temperatures are mild enough that you won’t suffer if the system needs a part replaced. Furthermore, addressing dust accumulation and electrical wear now ensures that the unit operates at its maximum Energy Efficiency Ratio (EER) from day one.
Step 1: Clearing the Outdoor Perimeter
Your air conditioner’s outdoor condenser unit is the workhorse of the system, responsible for dissipating the heat pulled from your home. Over the winter, it likely collected a fair amount of debris. Dead leaves, fallen branches, and even windblown trash can accumulate around the base and against the delicate aluminum fins.
Maintaining Proper Airflow
For the heat exchange process to work efficiently, the condenser needs at least two feet of clear space on all sides. Trim back any shrubs or ornamental grasses that have grown too close to the unit. Check the metal fins for any “crushing” or bending; if the fins are flattened, they block airflow. Using a specialized fin comb can gently straighten these back out, allowing the air to move freely and preventing the compressor from overheating.
Step 2: Interior Airflow and Filtration
Inside the home, the focus shifts to the evaporator coil and the blower motor. The most common cause of “frozen” AC coils in the spring is restricted airflow caused by a dirty filter. When air cannot pass through the filter easily, the temperature of the coils drops below freezing, causing condensation to turn into ice and effectively choking the system.
The Impact of High-MERV Filters
While it is tempting to buy the highest-rated filter available to improve air quality, filters with an excessively high MERV rating can sometimes be too restrictive for older blower motors. Consult your system’s manual to find the “sweet spot” where you get excellent filtration without forcing the motor to draw excess amperage. Replacing a standard one-inch filter every 30 to 90 days is the single most effective DIY task you can perform to extend the life of your equipment.
Step 3: Inspecting the Condensate Drain Line
As your air conditioner cools your home, it also removes a significant amount of moisture from the air. This water collects in a drain pan and exits through a small PVC pipe called the condensate line. During the winter, dust and stagnant water in this line can lead to the growth of algae or mold, creating a “sludge” that causes a blockage. Following a Spring AC tune-up guide means checking this line for clogs before you start the system. A backup in the drain line can cause water damage to your floors or trigger a safety float switch that prevents the AC from turning on at all.
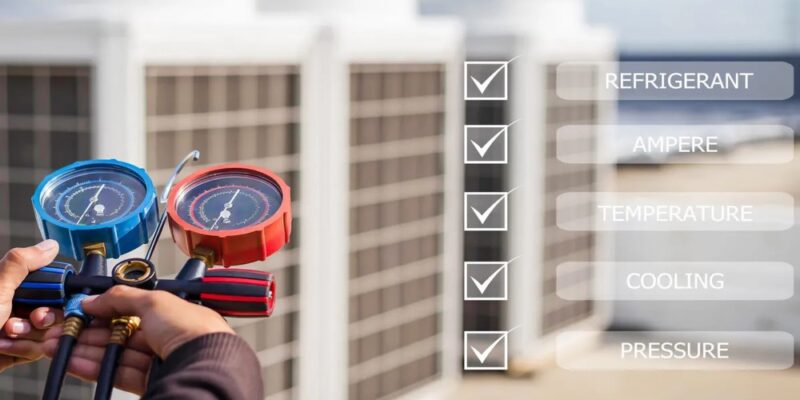
Professional vs. DIY: Knowing the Difference
While many homeowners are comfortable with basic cleaning, there are technical aspects of a tune-up that require professional expertise and specialized tools. A licensed technician will perform tasks that go beyond the surface level to ensure the internal “vital signs” of your HVAC system are healthy.
- Refrigerant Level Check: If your system is low on Freon or Puron, it has a leak that needs to be sealed. Simply “topping it off” is a temporary and environmentally unfriendly fix.
- Electrical Connection Tightening: Heating and cooling cycles cause metal to expand and contract, which can loosen electrical terminals over time.
- Capacitor Testing: This component provides the “start-up” energy for your motor. If it’s weakening, the motor will struggle to turn over, leading to a burnout.
- Thermostat Calibration: Ensuring your thermostat accurately reads the room temperature prevents the system from running longer than necessary.
- Blower Motor Lubrication: Keeping moving parts oiled reduces friction, noise, and energy consumption.
Maximizing Efficiency Through Smart Habits
Once your system is mechanically sound, you can further enhance your home comfort by adjusting your daily habits. Using ceiling fans in a counter-clockwise direction creates a wind-chill effect that allows you to set your thermostat about four degrees higher without feeling a loss in comfort. Additionally, keeping blinds closed on the south and west-facing windows during the day prevents “solar gain,” reducing the total heat load that your air conditioner has to fight against.
Conclusion
Preparing your cooling system for the spring is an investment in your home’s longevity and your family’s well-being. By clearing the outdoor unit, replacing air filters, and ensuring the condensate lines are clear, you significantly reduce the risk of a mid-season breakdown. A well-tuned air conditioner doesn’t just provide cold air; it provides a dehumidified, filtered, and energy-efficient environment that saves you money on every utility bill. Don’t wait for the heat to become unbearable-take the time this weekend to give your HVAC system the attention it deserves and enjoy a worry-free summer.